
Your refrigerator is one of the most essential appliances in your home. Your refrigerator is hard at work all day, quietly keeping your food fresh, drinks cool, and leftovers safe.
Most hardworking kitchen appliances, like microwave, oven, and a dishwasher are often the most overlooked when it comes to cleaning. A dirty refrigerator can encourage the growth of bacteria, mold spores, and unpleasant odors that not only affect the smell and taste of your food but can also make your family sick.
Spoiled or expired food can contaminate other items, while dust buildup on condenser coils and surfaces can cause your refrigerator to work harder, increasing electricity consumption.
Keeping your fridge clean is not just about appearances; it’s about health, safety, and efficiency.
The Ultimate Refrigerator Cleaning Guide
If you’ve been putting off a refrigerator deep clean because it seems too time-consuming or complicated, here’s a simple and stress-free refrigerator cleaning guide to make it easy:
Step 1: Prepare Before You Clean
Before diving into cleaning, make sure to unplug the refrigerator.
This helps conserve energy and keeps you safe while washing or wiping down the interior. If you have a lot of food, plan your deep clean before shopping day or when your fridge isn’t too full. You don’t want your perishable items sitting out for more than two hours, as this can cause them to spoil.
Prepare a cleaning mix using warm water, mild dish soap, and a bit of baking soda to neutralize odors.
You’ll also need paper towels, a microfiber cloth, a soft cloth, and a sponge. If you want to be extra thorough, keep a vacuum handy to clean underneath the appliance and the condenser coils regularly.
Step 2: Empty and Sort Your Food
Take everything out of your refrigerator and throw away any expired food or items that look or smell off. Don’t forget to empty all the drawers, either.
Spoiled or expired food is one of the main culprits behind bad fridge odors. Group the remaining food into categories (dairy, condiments, vegetables, leftovers) so it’s easier to put them back later. You can also put them in stainless steel containers to prevent moisture and contamination.
To prevent your food from spoiling while you clean, place them in a cooler with ice or in the freezer temporarily.
Step 3: Remove Shelves and Drawers
Next, take out all removable shelves, glass shelves, and drawers. This makes it easier to reach the interior walls and doors without obstruction. Let these parts reach room temperature before washing to prevent cracks, especially if they’re made of glass.
Wash each removable item in a sink using soapy water or your mild dish soap mixture.
Avoid using bleach or harsh chemicals, as these can damage surfaces and leave strong odors that spoil food later.
Rinse with clean water and let them air-dry or use a dry cloth to wipe them down.
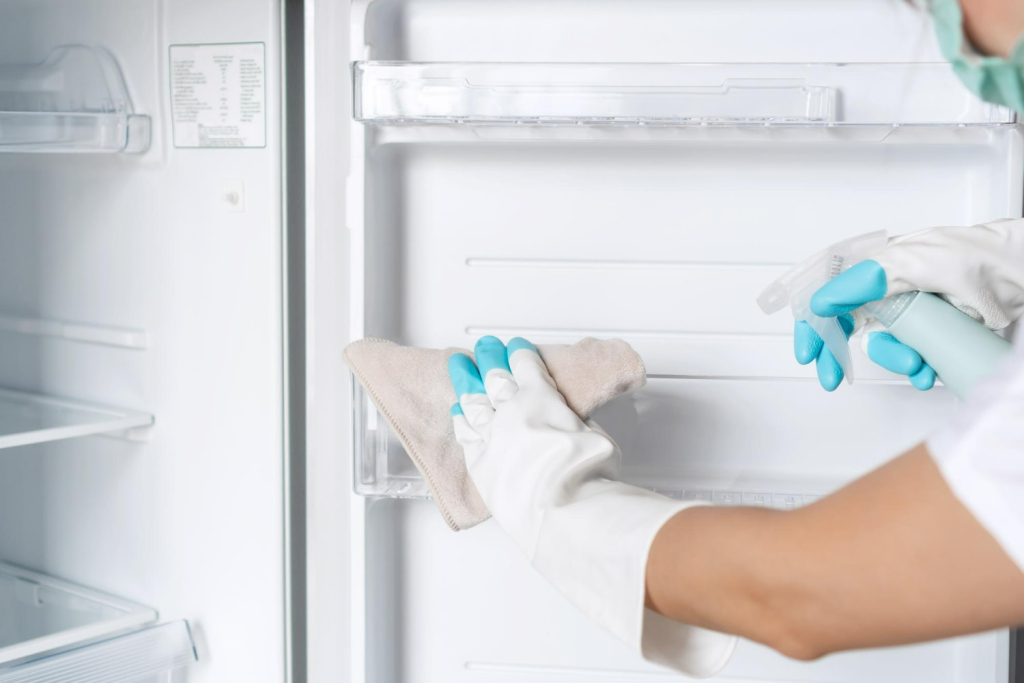
Step 4: Clean the Interior
Now it’s time to tackle the interior.
Dip a soft cloth or sponge in your warm water and baking soda mixture, then gently wipe the walls, shelves, and doors. Pay close attention to corners, door seals, and areas where spills often occur.
To clear away mold spores or sticky stains, let the solution sit for a few moments before wiping. For tougher spots, you can use a microfiber cloth dampened with soapy water and gently sweep over the affected area. You can also add a small bit of bleach to this mix to get rid of stubborn stains.
Always rinse and dry surfaces completely with a dry cloth to avoid streaks and prevent food contamination.
For stainless steel exteriors, use a soft cloth with a bit of soapy water, then polish with a clean, damp cloth and wipe dry to restore shine.
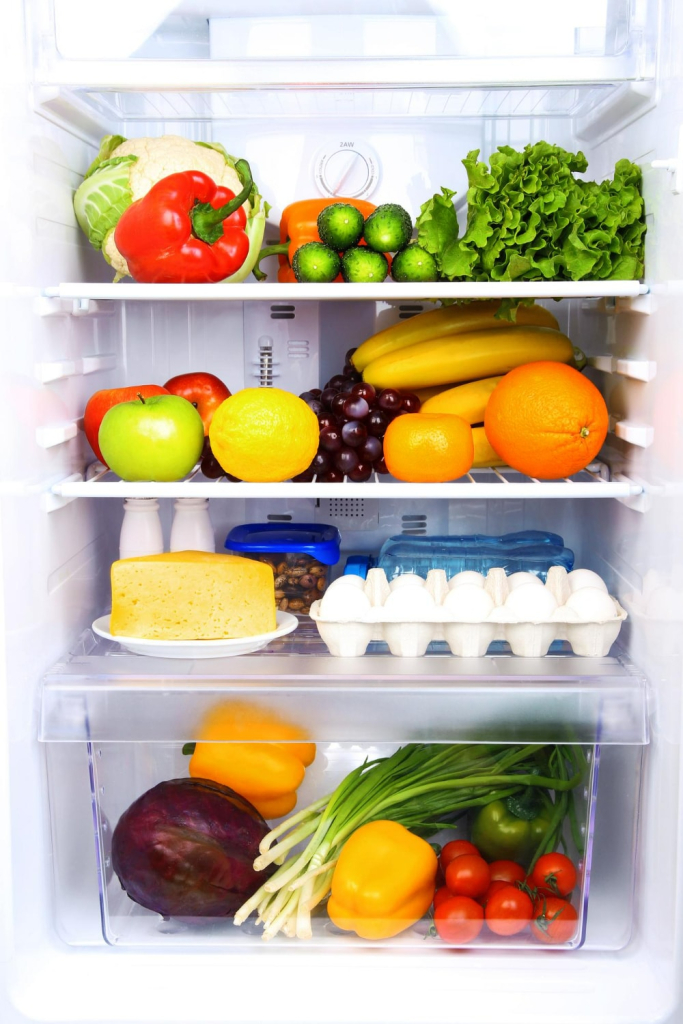
Image source: https://www.freepik.com/premium-photo/refrigerator-full-food_37120888.htm#from_element=cross_selling__photo
Step 5: Don’t Forget to Clean Underneath and Hard-to-Reach Areas
Many homeowners forget that keeping a fridge clean means caring for the outside too.
Dust can accumulate on the back and bottom of the appliance, affecting its performance. Use a vacuum or a soft brush to clean underneath and around the condenser coils regularly. These coils are essential for keeping the cold air circulating efficiently.
Wipe the exterior doors, handles, and walls with a microfiber cloth and mild dish soap solution, then follow up with a dry cloth. Make sure to clean underneath and behind the fridge too, since these are areas where dirt and dust tend to collect unnoticed.
Step 6: Reassemble and Refill
Once the interior and removable shelves are completely dry, reassemble your fridge. But don’t put food items back until your refrigerator is completely dry. Extra moisture will spoil food faster.
Take a few minutes to wipe down containers or jars with paper towels before putting them back. This small step helps maintain a clean fridge for longer and prevents spills or odors from spreading.
Before plugging the appliance back in, double-check that everything is dry, including door seals. This ensures your refrigerator stays in better shape and maintains proper temperature control. Once you plug it back in, let the cold air circulate for a few minutes before returning your food.

Step 7: Keep It Fresh Between Deep Cleans
A full refrigerator cleaning doesn’t have to happen every week. You can maintain freshness by doing quick wipes with a damp cloth once a week and checking for expired food every few days. Keeping an open box of baking soda inside the fridge also helps clear unwanted odors and absorb excess moisture.
If any spills occur, wipe them immediately using a soft cloth and warm water with a bit of mild soap to prevent mold and stains.
Also, refer to your owner’s manual for specific cleaning instructions, especially if you have special features or compartments.
Step 8: More Tips for Cleaning the Refrigerator
- Always use mild soap instead of harsh cleaners and detergents.
- Never use bleach directly inside your fridge, as it can leave toxic residues.
- Avoid submerging removable shelves straight from the fridge into hot water to prevent cracks.
- Don’t overload your fridge. It needs good cold air circulation.
- Set a reminder to clean your condenser coils every few months for energy efficiency.
Following these practical tips will not only make cleaning the refrigerator easier but also extend the lifespan of your appliance.
A Clean Home Starts with a Clean Fridge and a Comfortable Space in Camella
Maintaining a spotless refrigerator is more than a chore. It reflects how you care for your home and your family’s well-being. A deep clean done with patience and care keeps your food safe, your appliance running efficiently, and your kitchen smelling fresh.
In the same way, keeping your living spaces well-maintained and comfortable promotes peace of mind. At Camella, every home is designed to make everyday tasks like organizing, cleaning, and caring for your family more enjoyable and efficient.
With thoughtfully designed kitchens, easy-to-clean layouts, and spacious areas perfect for gatherings, Camella homes make maintaining a happy, healthy home simpler than ever.
So, after you’ve finished your next refrigerator cleaning, take a moment to enjoy the freshness not just in your fridge, but in your home. Because with Camella, everything is built to make life cleaner, brighter, and stress-free.